First of all, the book cover design to be taught in this tutorial article is not a full book cover design but just a front cover design. All the same, the procedures to be explained here still remain applicable in case that is what you want to create.
A book cover is a very important part of a book considering the fact that it speaks a lot about what a book could contain which makes it capable of either attracting readers or driving away readers.
This is why a designer pays careful attention to the book cover to make sure it sends out a very intriguing message as people look at it. Even though some book covers might not be in line with the content of a book, a designer has to achieve this to ensure the reader is able to trust the content of a particular book.
Read carefully the procedures and practice with the software to experience what you are reading to the maximum.
Open Adobe Illustrator.
Click "Create New" to create a new document with your size specification.
For width, enter 15cm; height: 10cm. Resolution is at default set to 72ppi but if you want it higher you can change it by clicking "Advanced Options" to drop a menu where you can change the resolution and also change the color mode to CMYK(standard mode for print documents or files). Click create to have the document set up.
Use Ctrl+0 to size the artboard to fit the window.
Create a monochromatic color scheme that has four(4) different saturations of the same hue selected. In this article, the hue for the monochromatic scheme is purple.
How to create the monochromatic color scheme
Create a square using the rectangle tool. Press M to activate the rectangle tool and hold Shift as you drag it on the artboard to create a square. NB: Without holding down the shift key as you drag, the shape created will be a rectangle.
Press V to choose the move tool. Click the square and hold down the Alt key as you drag to create a copy of the square. do this to get the four squares of the same dimension and make them adjacent each other as shown in the figure below.
Now select the base hue and go to "window" and click on "color guide". saturations of the selected hue are displayed in the menu that appears. Use the saturation of the hue displayed to complete your monochromatic color scheme. Draw a rectangle to fill the whole artboard with a fill of one of the colors of the scheme. Create a new rectangle halfway the artboard, right-click on the pen tool, and choose the add anchor point tool. With this selected, click on four places at the top of the rectangle to add the anchor points. Press A to choose the Direct Selection tool and click on the newly created anchor points to bring some down and some up to create a zigzag effect.
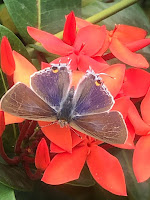
Use ctrl+shift+P to place an image on the pasteboard. This image will be put inside the rectangle. Alternatively, go to the File tab and click 'Place' in the menu to select your image and click place to place it. Drag the image on the pasteboard as it hangs on the selection tool to paste on the artboard.
Use the selection tool to drag the pasted image unto the modified rectangle. Right-click and hover on 'Arrange' and click 'Bring to Front'(Ctrl+shift+]) to bring it forward. Hold shift and drag the corners so that it fully covers the modified rectangle. Select the modified rectangle and press Ctrl+shift+] to bring it to the front of the image. Now have both selected by holding shift and using the selection tool, click on both the modified rectangle and the image to select the two.
After selection, press the Ctrl+7 to create a clipping mask. The clipping mask simply means putting the image into a rectangular modified shape.
Details of the book to be added:
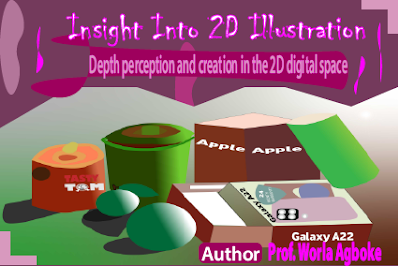
Title: Insight into 2D Illustration
Sub-title: Depth perception and creation in a 2D digital space.
Author: Prof. Worla Agboke
Select the type tool (T) and click once anywhere on the artboard and type the title. Using the selection tool, hold shift and drag the corners of the text bounding box to enlarge it proportionally without distorting it, and use the eye dropper tool (I) to select a fill color for the text.
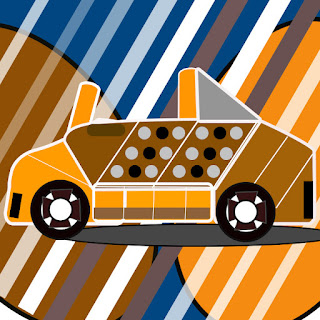
Above is the final book cover design for an illustration textbook. This cover design has an image of some illustrative works with the title text in an illustrative style just to make readers aware of the kind of images to be seen in the book.
Share your views about this tutorial in the comments and give recommendations of topics you want to see discussed in here.








Comments
Post a Comment
Share your views on this insightful content