These flyers have been designed with a concept and that concept is creating a flyer that sends a lovely message to a loved one in a season like the Valentine
The purpose of every design is to communicate or in another case to solve a communication problem. A lot of tools are available for the designer to problem effective designs that help to better communicate to an audience.
Audience in graphic design refers to the specific group of people for whom a design work is targeted. Without in-depth knowledge of those who are to make use of design work, there is ineffectiveness as the design won't be objective as it needs to be.
A flyer is one of the communicative means of design, especially in this age of digitalization, it has become very useful quick, and effective to send messages to either large or small groups or people. Flyer uses texts, and images to convey information. The difference between a flyer and a poster is that a flyer is mostly for sending information in the digital space whilst a poster has to be printed as a hardcopy and pasted on notice boards, trees, etc.
What to know about flyer design
Before the production of any design work, the elements of the design have to be well-understood with the working principles as well for effectiveness of any kind. The elements every design makes use of include color, line, dot, shape, texture, form. There are two categories of the guiding principles of design and they are the primary principles and the supporting principles.
Primary principles: unity, variety, hierarchy, dominance, proportion, and balance.
Supporting principles: rhythm, scale, emphasis, movement, proximity, repetition.
The elements in addition to the principles help to create a meaningful and well-organized design. Every design no matter how complex the layout or what so ever makes use of the basic principles hence a very deep understanding of the basics is a great step for success in any designing activity.
Layout
It is the arrangement of the elements in a design and it specifically refers to the ordering of images, texts, shapes, lines, dots, etc. The design elements if arranged well will create a smooth visual flow for the readers or audience making them not move their eyes unnecessarily through a design.
Concept and inspiration
Most professional designers spend time to understand the reason for a design in progress, research about audience and their visual literacy, status, and a whole lot. The design does not only communicate by the use of nice and attractive graphics but it carries psychological elements that make it able to function as intended. Inspirations can be a great way in generating ideas for a project through the review of similar projects made for a related problem but copying ideas is a very unprofessional way of creating a design.
In this article, the design application to be used for designing a simple flyer is Adobe Illustrator which is a vector software.
Project Details
Design a flyer that tells your colleague students in high school about a kind of cloth produced in your area.
Details:
Document size: A5, Name of company; Lead Kente, design color blue or saturation of blue, telephone number: 0243369702, images of cloth, short text: We clothe you best with local kente. Quality and affordable prices.
Design Process
- Problem identification (Awareness creation about cloth)
- Research about audience visual taste or literacy. Research about similar designs for inspiration.
- Sketches
- Refine and finalize thumbnails
- Create prototype using the software.
Open Adobe Illustrator.
Click 'Create New'. A new document creation interface opens.
Click on the 'Art & Illustration' tab. Manually input the size which is 420 x 595px. Resolution should just be 72ppi and color mode should remain RGB.
Click 'Create' to continue.
Use Ctrl+0 to center the artboard in the document area.
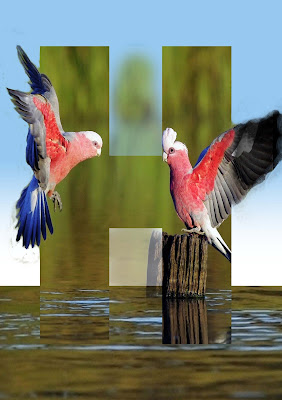
Demonstrations about the concept of planning where rectangles were used to create frameworks for the design elements of the flyer
Choice of color, shapes and layout is very key to making a design that is productive meaning it is able to send the message it has been created for.
Select the move tool and click on the first rectangle to select, hit the backspace to delete it. Select Type tool or alternatively press T. Click and type the word.
To modify, select the move tool from the tools panel and hover at the corner of the bounding box and an cursor will appear. Hold the corners to enlarge the words without distorting the writing.
For the images, a clipping mask was created. To create a clipping mask, paste the image to be used by using Ctrl+shift+p. Draw any shape over the pasted image and then select both the image and the shape by dragging over them with the selection tool. Press Ctrl+7 and the clipping mask will be created.
Saving the fileTo save the file, move to the tab with the name 'File' and hover over export and then click export for screens.
Note: Select file location to save the file by choosing a folder from the export to: box and then you can check the boxes below that,
1) Open Location After Export.
This will open where the file is saved immediately after it has been saved.
2) Create subfolders.
With this one, subfolders will be created for every file you save in the folder you first selected for saving the documents. This one mostly should be unchecked if you do not want every file to have its own folder.
Choose the file format. The ones available include: PNG, PNG 8, JPG 100, JPG 80, JPG 50, JPG 20, SVG, PDF.
The flyer worked on in this article was saved in JPG.
The details are: dimensions 420 x 595px, size: 87.7KB.
Flyers can even be designed using Microsoft Word ones you understand what you doing.


Comments
Post a Comment
Share your views on this insightful content