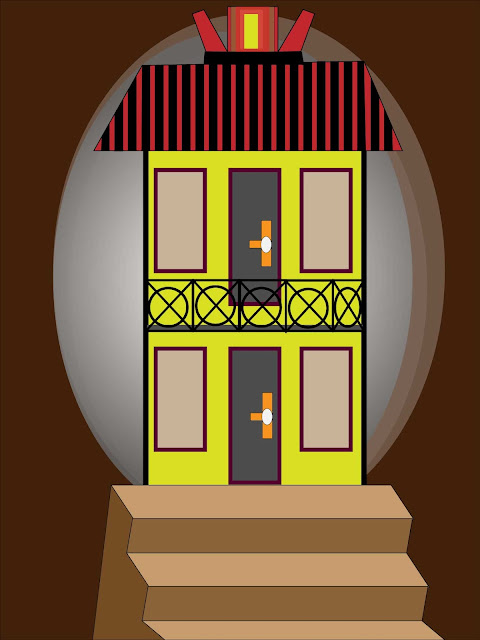
How interesting it is when a drawing is made from a playful activity of a drawing aid and it becomes nice to admire! One of the computer software that aids in drawing (illustration) is Adobe Illustrator. Use this link Adobe Illustrator to learn more about this wonderful application.
 |
| Beautiful house design in Adobe Illustrator (Ai) |
Do you want to get your simple drawings into quality vector graphics? Many of the complex illustrations are simple ideas people incubated and as they built upon them, great artworks sprang up. Our activity in this article is to take a simple child-like drawing into a high graphical design or illustration.
I am offering to show you in simple ways how you can design a simple house in Adobe Illustrator with simple shapes. To be able to illustrate both complex and simple objects means that you have simplified them as being made from simple shapes. This idea really makes a difference in how one perceives objects and that is what this article is all about; the simplification of huge structures into simple shapes put together as a whole.
Ready! Let's make progress.
We are illustrating a house in Adobe Illustrator and it should look good after we are done. So, first of all, you must download the software if you do not have it. It's really important.
 |
| House frame with stairs |
Open Adobe Illustrator, click on the File tab and select New and then create a new illustration document. The pop-up window that appears when you click New has tabs like Print, Film, Video, Art and illustration, Web, etc. Do well to choose the page orientation as you want. The color mode can be RGB; a resolution of 72dpi is alright. It's just a simple practice so a high resolution is not really needed.
Select the rectangle tool(M) from the tools panel as shown in the screenshot above. Select the rectangle tool, click-hold, and drag to create the rectangle.
Then right-click and select shear from the drop-down menu and shear as shown. With the move tool selected, hold alt and drag to create a copy of the sheared rectangle.
Click the duplicated rectangle and right-click and select reflect from the drop-down menu. Move it below the first sheared one and repeat similar actions to get the same progress as the diagram above shows. There are going to be stairs leading to the door of the house.
 |
| Finishing the stairs to form a cross-section |
Now, some might have other ways of doing this but I suggest with the Pen tool(P), click and create a triangle beside the stairs above shown in the cross-section. Without this triangle, at the side, the stair is not complete. The sheared rectangles should be placed facing opposite directions.
 |
| Roofing in place |
Making the roof a simple one with some sort of light at the top.
Create a rectangle following the previous method outlined and with the direct selection tool narrow the top a little. Create the lamp on top of the house.
 |
| Addition of doors, windows, and guide for the first floor of the building. |
This part demonstrates the creation of the doors and windows. The building is a storey building with a guide for the first floor. You can make the guide with your own creative idea. See how simple the structures have been represented, great works really begin from small beginnings. The stairs look slightly tilted towards the right-hand side; it might seem unusual but it is what we want to achieve with this tutorial.
 |
| Coloring the roof, house, and the stairs |
Let's get to color this drawing to make everything look superb. Wow, this is going to look very beautiful with the application of very good choice colors of yours. Just apply the colors by selecting the various shapes with the selection tool or alternatively press Ctrl+V. You then go to the options menu to select the fill and stroke colors to match the above ones. It can also be done alternatively by moving to the fill/stroke color palate in the tools pane. Once you get advanced in knowledge of colors, you can add colors to show a gradation of lighting which will professionalize the look of your illustrations.
 |
| Coloring the doors and windows |
Our work is becoming more professional after choosing the fill and stroke colors for the windows and the doors. For the roof, draw a rectangle over the roof, and click the selection tool to move the rectangle a moderate distance to the right. Click Ctrl+D to repeat the process until the whole roof is covered.
The selection tool can be used to elongate the rectangle(vertically longer) upwards. Now, click the direct selection tool and zoom in by pressing Ctrl+ (+) and click the top corners of the rectangles to fit them to the roof exactly. You can even choose any method you desire depending on the skills you have acquired from illustrator knowing that the results can be achieved with different methods also.
 |
| Door handles in place |
The door handles were rectangles and an ellipse with the fill color as a contrasting color to the .door. Create a rectangle to fit the artboard and click shift+Ctrl+(]) to send the rectangle back.
 |
| Final output with a little background design to pop the house. |
Finally, create an ellipse and change its gradient with the colors demonstrated, and send it to the back of the house. You can right-click the circle you create and select send to back or alternatively press (Ctrl+shift+[). All so soon you have just designed a nice-looking house in illustrator. This can be used for a book cover or some important use. Once you have decided to learn, experiment with the wild ideas that run through your mind because you never know what could emanate from them. One sure way to practice vigorously too is to draw or sketch and after that, you can vectorize them as I have just shown in this simple piece.
Remember,
Adobe Illustrator is a vector software which means it works in vector graphics. Some vector file formats are Ai, pdf, SVG, and eps. It can be used to create flyers, banners, business cards, brochures, labels, character designs, and even 3D illustrations.


Comments
Post a Comment
Share your views on this insightful content